Add pictures
There are different ways of importing pictures to Mediablob, see instructions below.
Various ways to import pictures
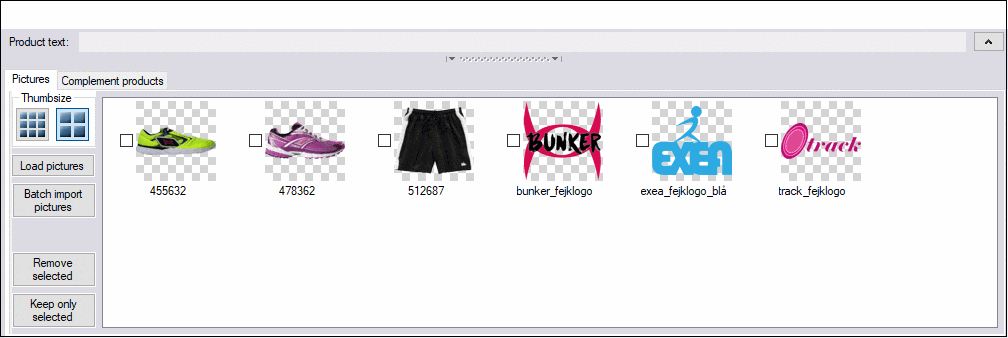
In the bottom half of Mediablob there is a space where you can store your personal pictures. This is a temporary library and the pictures there are only visible and available for you.
Option 1. Drag and drop one or several pictures from a folder or your desktop directly into your library.
Option 2. Load pictures – import one or several images from your computer.
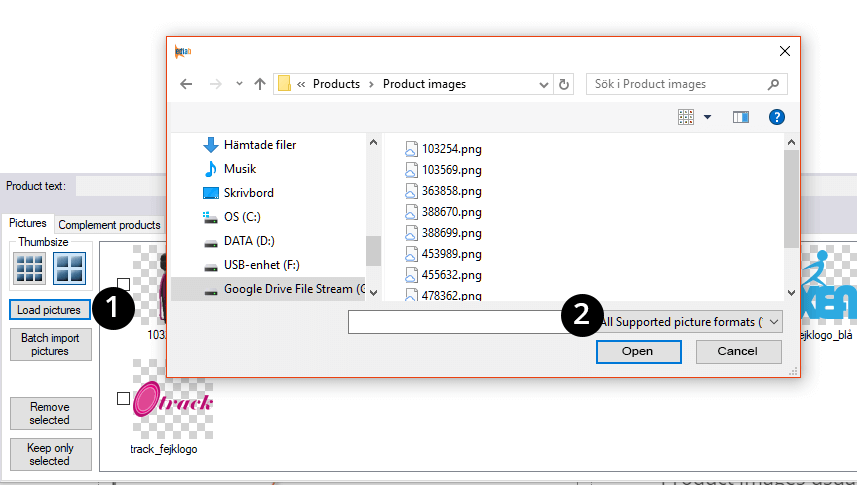
1. Click on Load pictures.
2. Search for the pictures that you want to import, select one or more and click Open.
The pictures are now imported to your library in Mediablob.
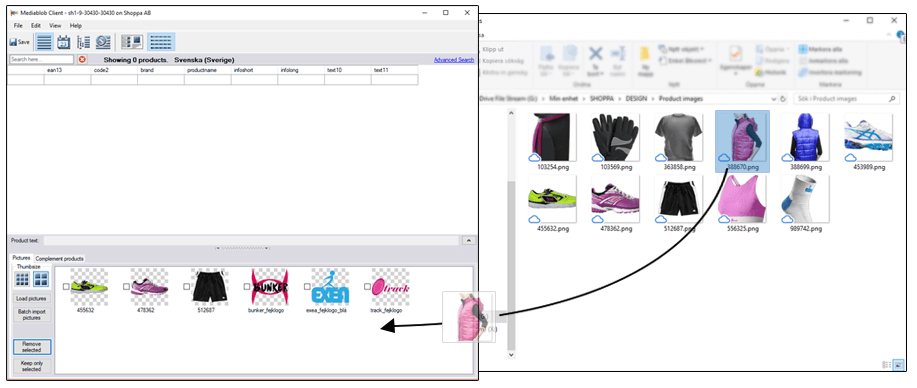
Option 3. Drag and drop a picture from your website.
If you don’t have a applicable picture on your computer, you can just as easily drag and drop a picture from a website instead.
1. Go to your website.
2. Drag the picture you need from the website right into the picture library in Mediablob.
You can now pair the picture to the right product.
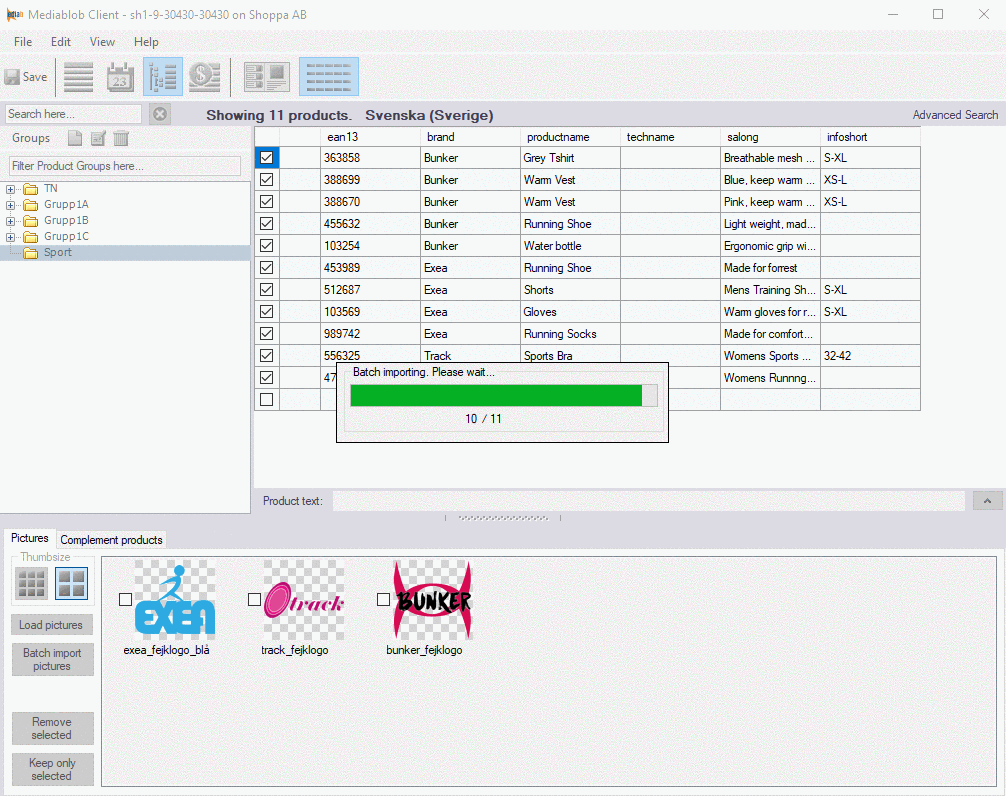
Option 4. Batch import: import pictures directly to the products (instead of direct to the library).
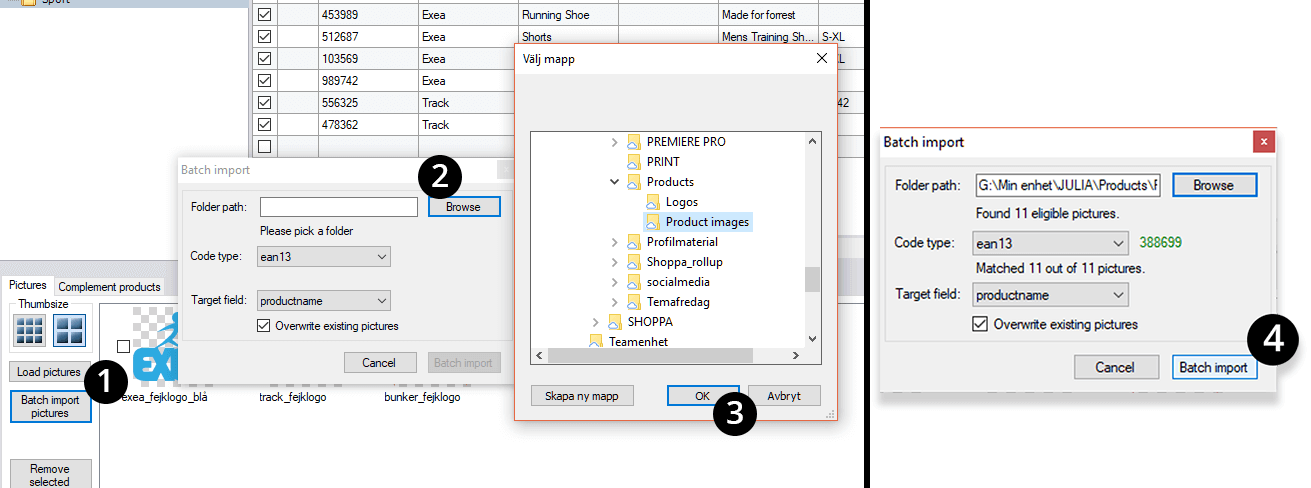
Batch import works if the pictures have the same unique code as the products they belong to. The picture will then automatically find the right product and place itself in the field of your choice (step 4).
1. Click on Batch import pictures.
2. Browse for the folder on your computer that contains the pictures that have been named with the unique codes.
3. Select the folder and click Ok.
4. Select which code the pictures should search for, i.e. in which field they should be placed, and click Batch import.
Mediablob now imports the pictures and places them with the correct product. See the product list below, how the pictures place themselves in the right fields, like in this example; in the field productname.
Apply pictures on products
General placement of pictures in fields:
Product picture in the field Productname.
Brand/logo in the field Brand.
Other icons, e.g. Eco, Locally grown, Adidas etc. in the field Seals.
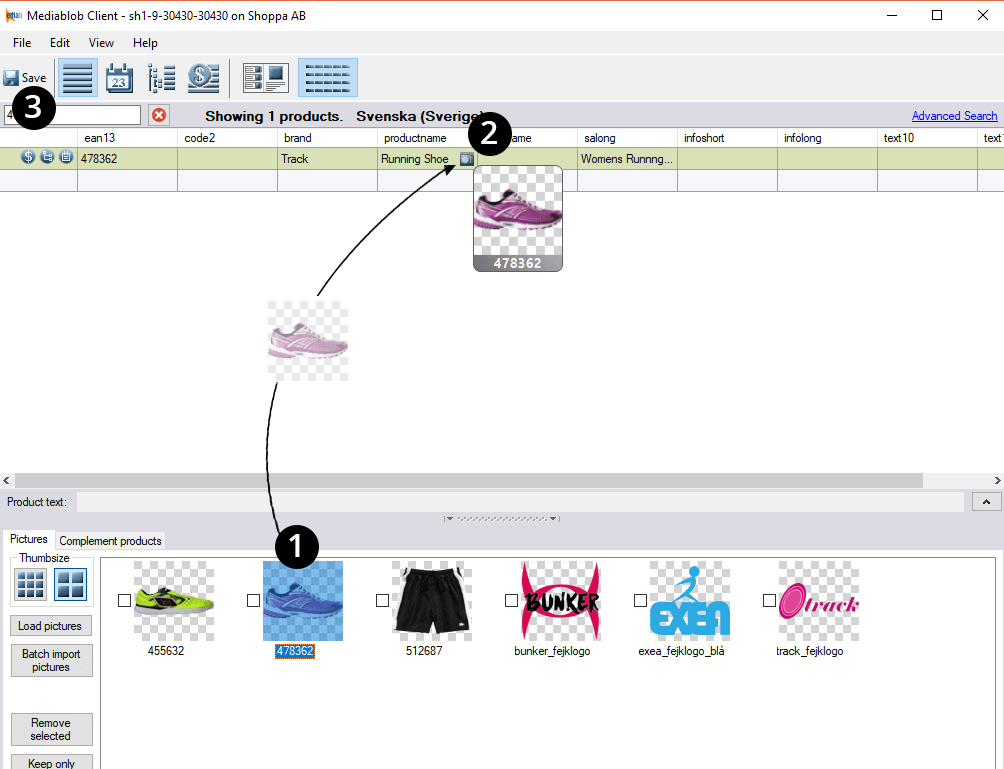
Add a picture to a product
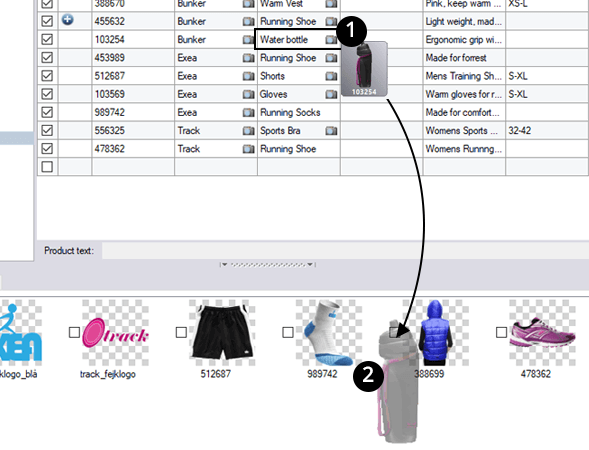
1. Drag the picture from you Mediablob picture library.
2. Drop the picture into the correct field.
3. Click Save.
You will now see a camera icon in the product field. If you hover over the icon you will see a thumbnail of the picture.
Option 5. Give multiple products the same picture at the same time – great for e.g. logos.
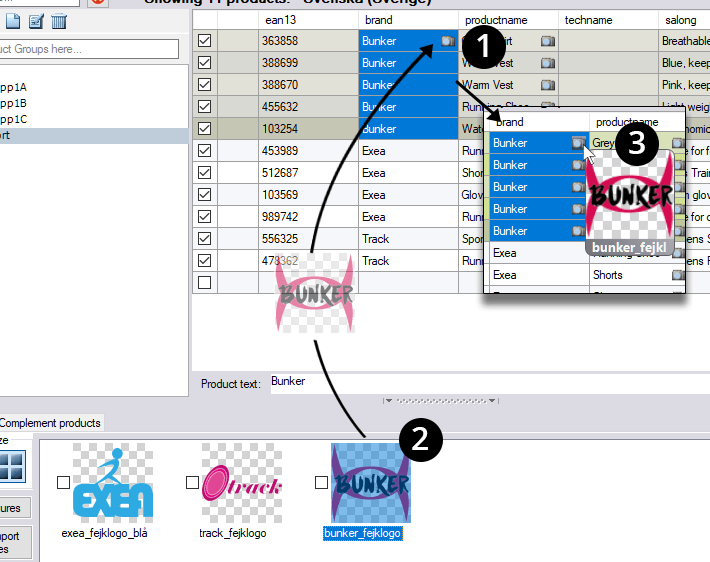
If you want to set the same picture for multiple products, do this:
1. In the product list, mark the products that need to have the same picture. Mark the fields where you would like the pictures to place themselves.
2. Drag the picture from your Mediablob library and drop it over the selected fields of any of the marked products.
3. The picture is now placed on all the marked fields.
Copy a picture from a product to the Mediablob library
- 1. Grip and hold the camera icon.
- 2. Drag the icon into the library and release.
- The picture will appear in the library and you can now drag and drop it onto another product.
Tip from Shoppa!
The picture library is locally bound, only you can see the pictures from your computer. The picture is visible to other users once it is placed onto a product.
Remove pictures
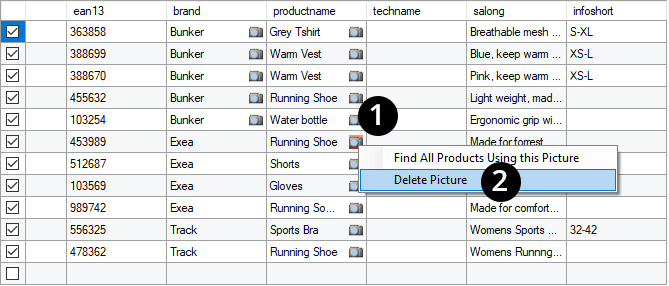
Remove a picture from a product.
- 1. Select a picture by clicking the camera icon.
- 2. Press Delete on your keyboard or right-click on the camera icon and select Delete picture. Click Save.
Remove pictures from the library.
Click on the picture you want to delete and then click Remove Selected. This will delete one picture at the time.
To delete several pictures at the same time:
- 1. Select all the pictures that you would like to delete.
- 2. Tick the checkbox of any of the selected pictures, which will then affect all pictures.
- 3. Click Remove Selected.