
Create a campaign
Campaigns for the stores to use when printing from Shoppa are easily created in Mediablob.
NOTE! You cannot work in the same campaign on two different computers at the same time.
New campaign
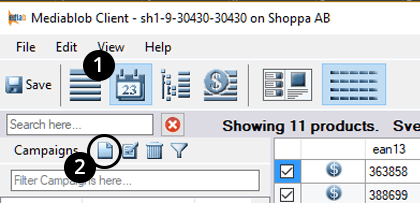
- 1. Click the Campaign Mode icon.
- 2. Click the New Campaign icon.
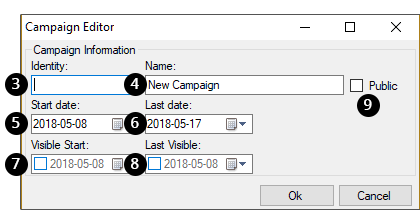
- 3. Give it an Id.
- 4. Name it.
- 5. Specify Start Date.
- 6. Specify Last Date for the campaign to be active.
- 7. (Optional) Specify in Visible Start when the campaign should become visible to the stores.
- 8. (Optional) Specify in Last Visible when the campaign should cease to be visible to the stores.
- 9. Specify whether the campaign should be Public to your stores or not.
Add one product at a time
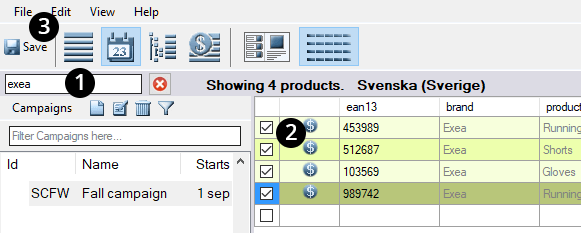
- 1. Type the search term/code in the search field.
- 2. Tick the box to the left of the product row to add the product to the campaign.
- 3. Save.
Add several products at the same time
If you have a product list in an Excel format, it can be used to quickly and effortlessly create a campaign. However, this requires that the products are already imported into Mediablob (in the Product Mode).
- 1. Copy the product codes from the Excel list.
- 2. Paste into the corresponding empty Mediablob field (EAN13 or code1 – 4).
- 3. Save.
Campaign specific product information and pictures can now be imported and will overwrite the existing information for the duration of the whole campaign (e.g. Christmas specific pictures will only show as long as the Christmas campaign is active and public, and then automatically go back to the products original pictures).