
Print campaigns
In Shoppa version 2.18 and onward there are several ways of printing campaigns. One of them is to use Print campaigns. Unlike multi-printing, a Print campaign is a ready-made Printer queue set up by a head office.
In Shoppa version 2.18 and onward there are several ways of printing campaigns. One of them is to use Print campaigns. Unlike multi-printing, a Print campaign is a ready-made Printer queue set up by a head office.
1. Go to the Printer Queue tab.
2. Select the folder that needs to be printed.
3. Click on the Add to Printer Queue blue plus icon to print the entire campaign.
4. The pop-up window Add Campaign to Queue will appear.
5. Click Ok after you have made your selections.
6. Click on the Print icon, and all different formats will be printed at once.
Once the head office has published a campaign, it’s possible for the store to do some editing of the signs in the campaign before printing.
1. Go to the Printer Queue tab.
2. Select a campaign folder in the left column.
3. Select a format to edit.
4. Click the fields outlined in a blue frame to change the information in the templates.
5. The format can also be changed, simply select another format (in the layouts window). Note how the folders will change in the upper left column.
6. To change the number of copies of each sign, select the template and click the + or –.
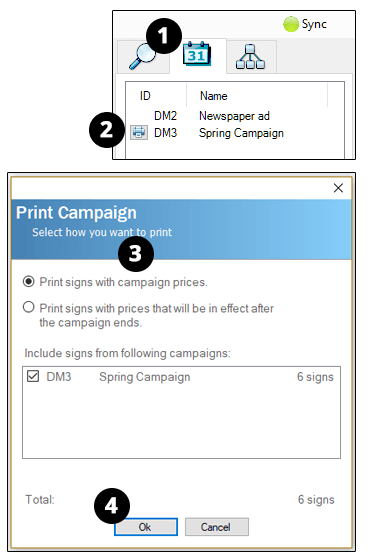
The head office can publish a Print campaign that is connected to a campaign. When printing, solely the products saved under the Print campaign will be printed, even if the main campaign contains more products.
The Print campaign appears under the Campaigns tab in the form of a printer icon to the left of the campaign name. In order to edit the signs before printing, you must go to the Printer Queue tab. If you click the printer icon next to the campaign name, the signs will be added to the printer queue and thereafter they will be printed without the option to edit them.
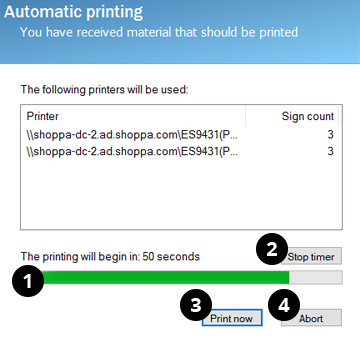
The head office can also choose to post a campaign that will be printed automatically for all stores that are part of the chain. When such a campaign is posted, you will see the window Automatic printing pop up on the screen indicating that you have material to print.