
Controlling tags/bindings
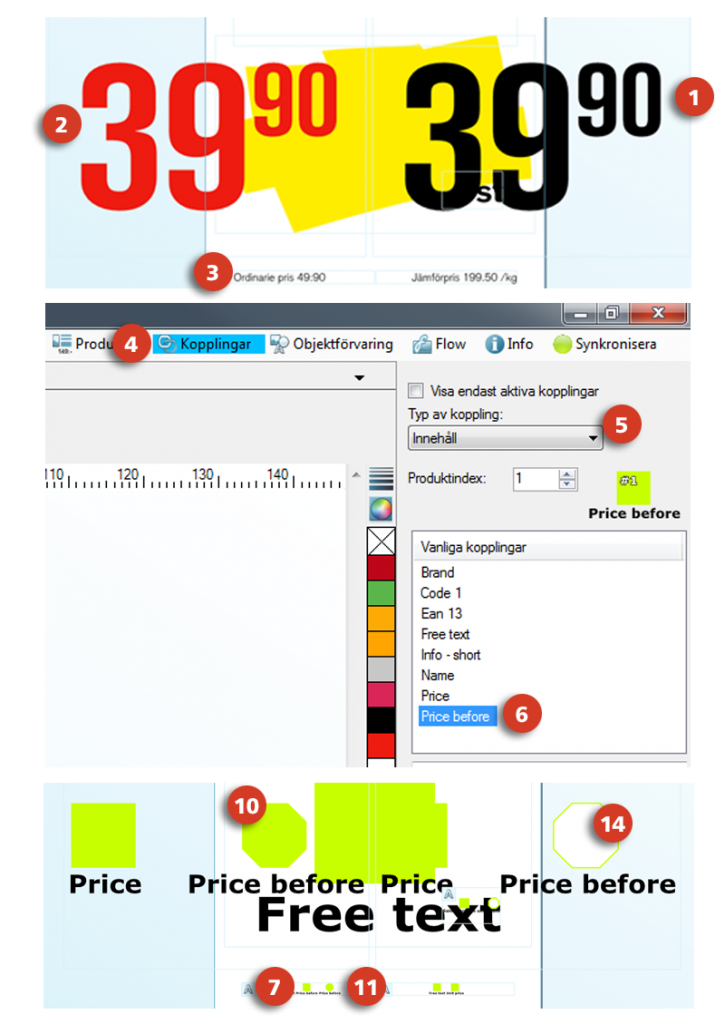

Example: Set the price in black for standard price, and red for sale price.
Here are instructions for how you in a simple manner can set black prices for your standard prices and red prices for your sales prices, in the same template. With this set up you will create automatized templates which will show the right color/element for the right occasion.
- 1. Create a Price box, with a black colored price.
- 2. Copy the Price box, make the copy red colored. Place the prices beside each other.
- 3. Create a text box, with the text Ordinary price written inside of it.
- 4. Click the Tags tab at the top right.
- 5. Inside of the Tags folder, make sure that the binding type Content is selected.
- 6. Select the binding Price before.
- 7. Drag the selected Price before binding to the Ordinary price text box and release the selected binding next to the green Free text symbol.
- 8. Select the binding type Visibility.
- 9. Select the binding Price Before.
- 10. Drag the selected binding to the price box with the red price this time. This means that the sale (red) price will only be visible when there is an ordinary price.
- 11. Select Price before (with the binding Visible selected) and release the binding over the Ordinary price text box. This means that the ordinary price will be visible when there is both an ordinary and a reduced price.
- 12. Select the binding type Inverted visibility.
- 13. Select Price Before.
- 14. Drag the selected binding to the price box with the black price. This means that the original (black) price will be invisible when there is an ordinary price.
- 15. Lastly, place the large black price and the red price in the exact same position. Now, when there is an ordinary price filled in, the black price will become invisible and the red price visible.

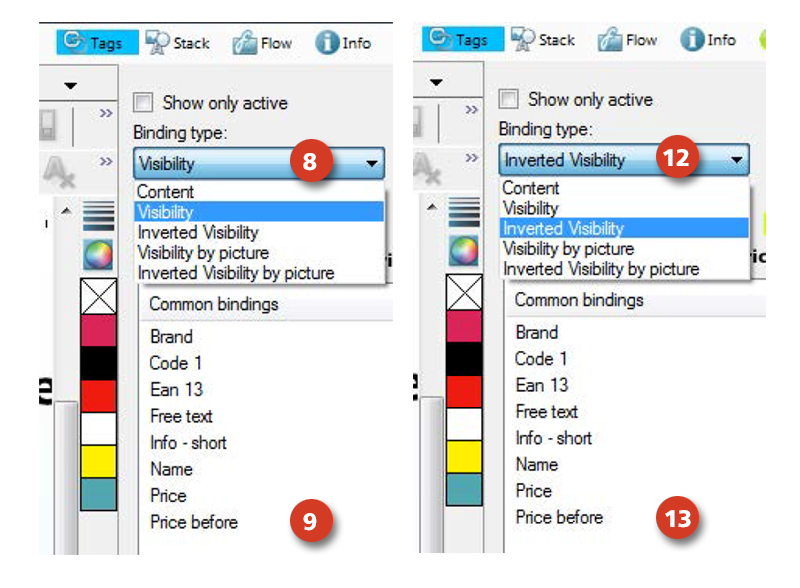
Tip from Shoppa!
You can ‘lock’ the invisible fields by clicking the symbol Only show visible elements in the upper list. This means that all you can move is also what you can actually see.


Tip from Shoppa!
Visibility by picture = filled octagon with mountain
Inverted visibility by picture = framed octagon with mountain
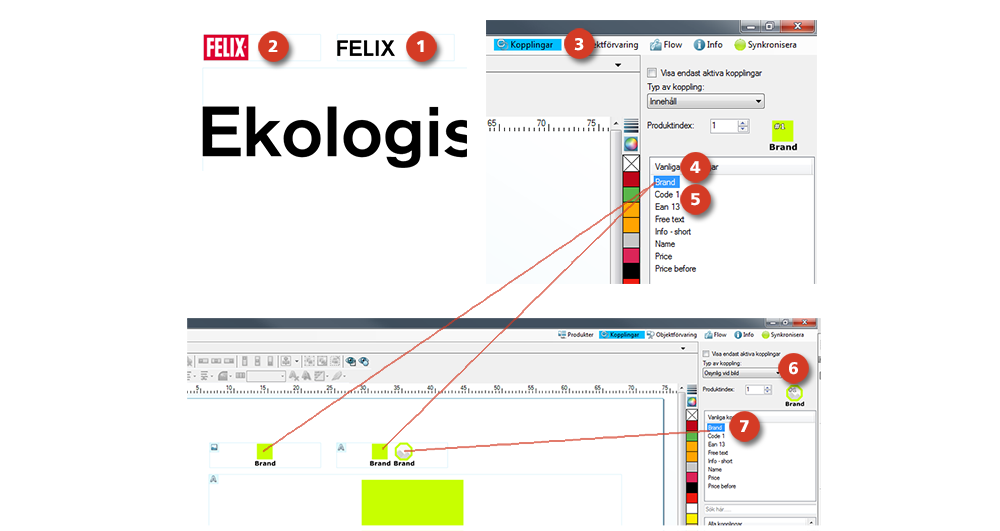
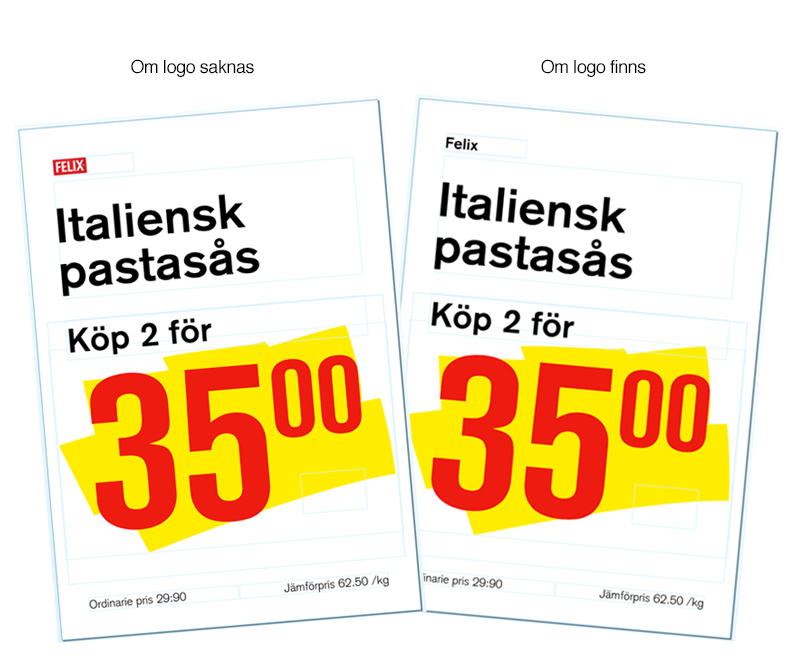
Example: With or without image
Another very useful function to set up in a template, is that if for instance a brand logo is missing, then at least the brand’s name will automatically be displayed instead. This is practical because from a customer point of view (which will as a result increase sales), it is always better to have as informative templates as possible. (This function only work for users with a connection to Mediablob or another external system).
- 1. Create a text box and write the brand name in it.
- 2. Create an image box for the brand.
- 3. Go to the Tags tab. In there, make sure that the binding type Content is selected.
- 4. Drag and release the binding Brand to the text box with the brand.
- 5. Drag and release the binding Brand to the image box for the brand.
- 6. Select the binding type Inverted visibility by picture.
- 7. Drag the binding Brand to the text box with the brand. Now, the text in the brand text box becomes invisible if there is a picture logo.