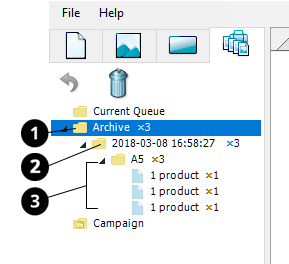
Printer queue

You can review the signs you would like to print under the Printer Queue tab. Here the signs are sorted into different folders based on their formats. Here is also were you get a great overview and can easily change format, correct texts and do any last adjustments before printing out. 

Overview the Printer Queue

Instructions

1. Add desired formats to the Printer Queue.
2. Go to the Printer Queue tab.
3. A list of folders with the sorted signs are located in the left column view in Shoppa.
4. Click on a folder to preview the signs as thumbnails.
5. Click on a sign to view it in full size. You can now make any eventual adjustments.

Edit the signs in the Printer Queue

Add extra signs (make copies)

Remove signs from the queue

Option 1

Option 2

Edit the format in the queue

Archive

There is a folder called Archive under the Printer Queue tab. It contains previously printed signs. Here you can for example re-queue a sign. The Archive is purged automatically after about two weeks.

  • 1. Archive folder.
  • 2. Sub folder named with the date and time when the signs were printed.
  • 3. Sub folders with used/printed templates. The signs are sorted into folders based on their formats.