
Managing objects
Lock object
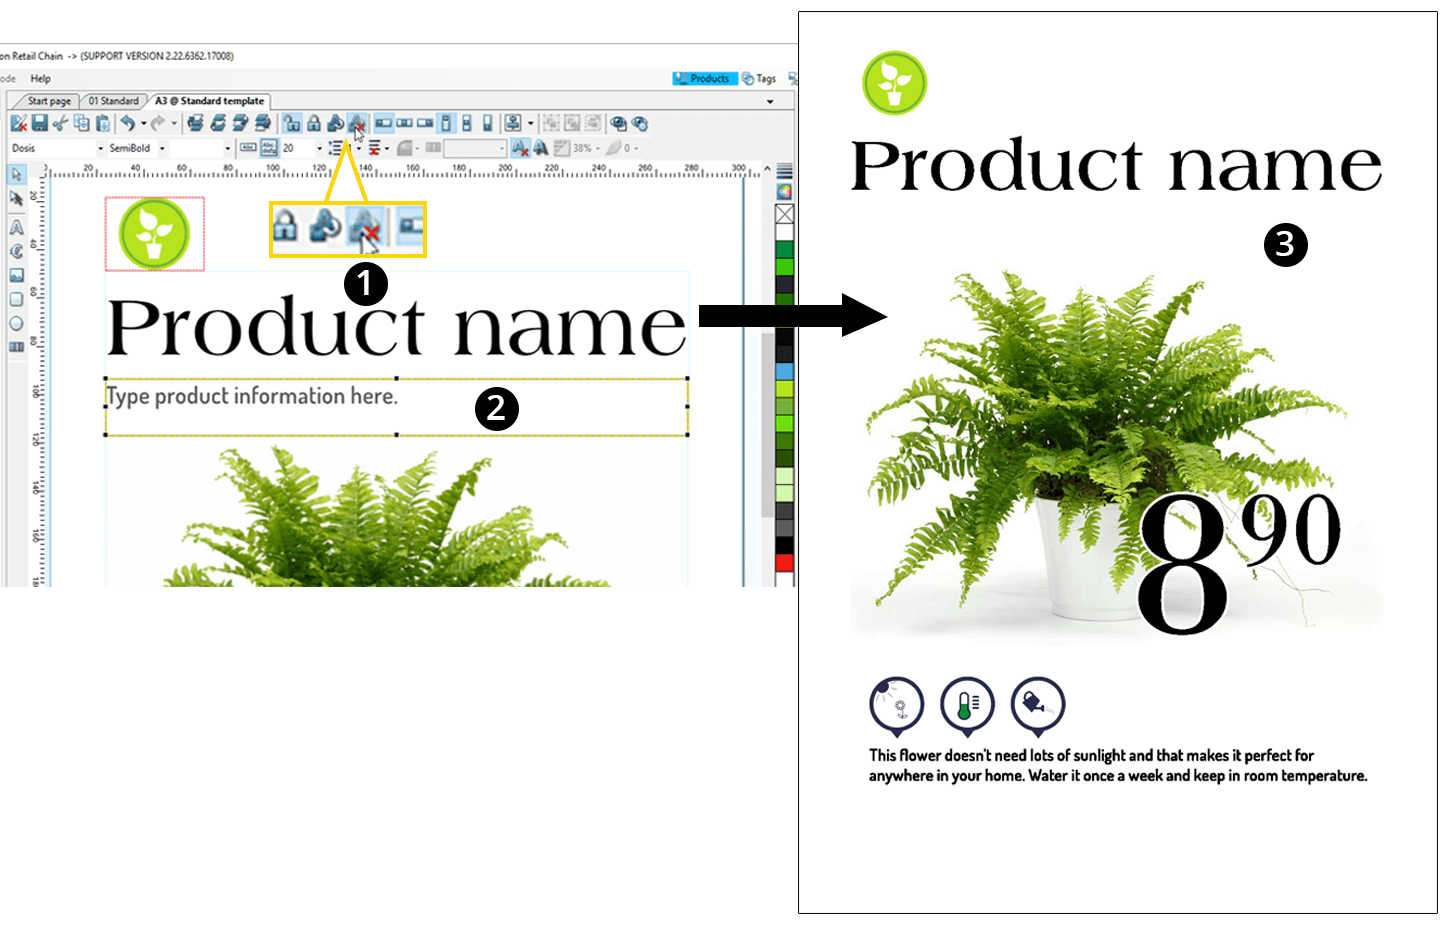
By locking a field the Plus user (the store) is prevented from changing it. The function can be used for, for instance locking the chain’s logo or text boxes. Thus, the head quarters can set and manage exactly what stores can and cannot change themselves.
- 1. Enter the Design mode.
- 2. Select an object and click on the Lock icon.
- 3. In the template the locked items are then outlined with a red, dashed frame.
- 4. Click Save.
- 5. Exit Design mode.
Hidden when printed
You might want to incorporate some guiding text fields in the template, to assist the Shoppa Plus users (stores) when editing and preparing a sign for print out. These guiding text fields are not meant to be printed out, so therefore you can make these objects invisible for print out.
1. Select the object and click the symbol Hidden on output.
2. When an object is invisible it becomes outlined by a yellow dashed frame. It will show on the screen in Shoppa, but it will not print out. To make the object visible again, click the symbol Visible on output.
3. The object is not visible on the printed sign.
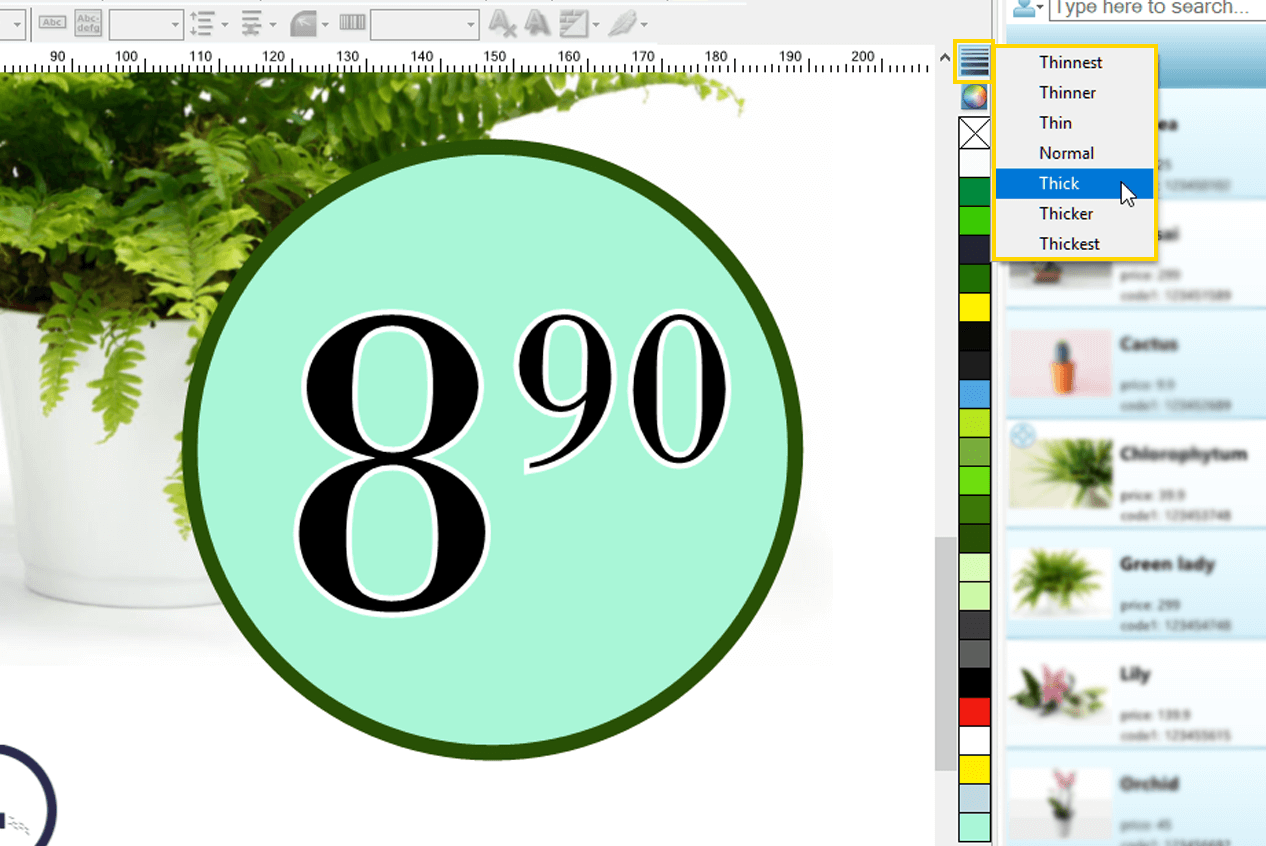
Colour of filling or frame
Left-click = fill the entire object in the selected color
Right-click = colors the frame/outline with the selected color
1. Select an object.
2. Left-click on the desired color to fill the entire object in that color.
3. Right-click on the desired color to give the object a colored frame/outline.
4. Choose the desired thickness for the outline/frame by clicking on the Outline thickness button, which is located above the color palette.
Position inside a box
There are six choices to choose among, when deciding the position of a text or picture inside of a box. Options of placements of a picture or text within a box; Align Left, Align Center, Align Right and also Align Top, Align Middle, Align Bottom.
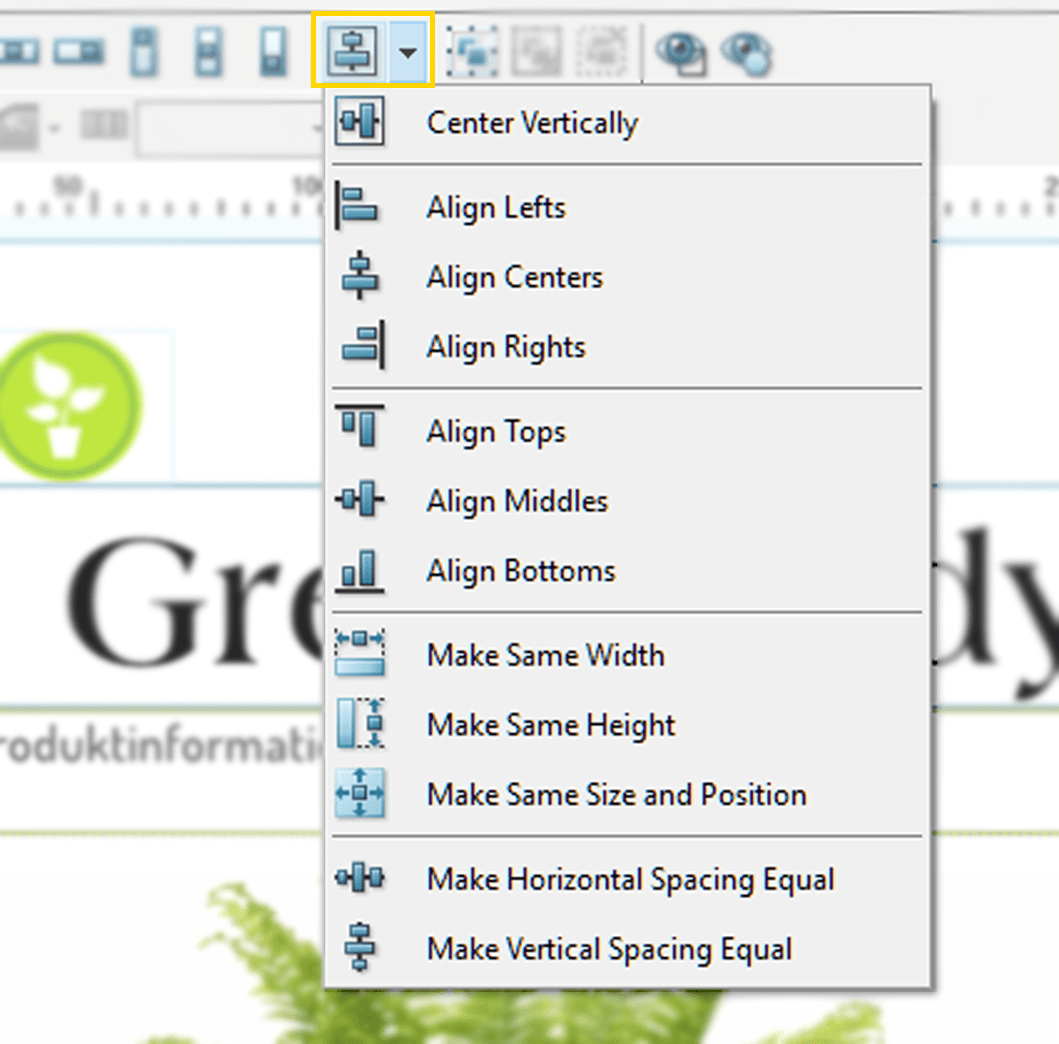
Guiding objects – alignment
Various objects can easily be adjusted in relation to each other. For instance, objects can be adjusted to have the same width, height or be positioned to the same linear edge.
- 1. Hold down Shift and click firstly on the objects you would like to adjust.
- 2. Lastly, click the object you would like the other objects to adjust after. A broader marked frame tells you this is the guiding object.
- 3. Select desired adjustment action.
Tip from Shoppa!
The line is always adjusted from the outside of the object when an object has a broader marked frame.
Tip from Shoppa!
Click and drag a marking box around all objects you wish to select at the same time.
Different barcodes
- 1. Use the New Barcode Element tool and create a box.
- 2. Select the Barcode Type in the drop list.
Tip from Shoppa!
Did you know that Shoppa can create a QR code automatically, and be connected to a web page of your choice?
Move objects with the arrow symbols
Use the arrow symbols on your keyboard to move objects. For longer distances hold down Shift + arrow (=10 x times the distance), or to move more precisely, hold down Ctrl + arrow (=1/10 times the distance).
Move with x-/y-axis lock
To move an object only vertically or horizontally, hold down Shift and drag it up/down or sideways.
Increase/decrease size and scale proportionally
- 1. To change the size of an object, select it and drag one of the black squares in the corners of the object to change its size.
- 2. To scale proportionally, select the object and hold down Ctrl whilst dragging the squares in the corners of the object.
Rotate or warp an object
- 1. Double click an object, so that the squares and circles on its outline appear.
- 2. Drag one of the squares to warp the object.
- 3. Drag one of the circles to rotate the object.
Tip from Shoppa!
Make copies with the computer mouse; select an object and keep holding it, drag it to the side, right-click (without releasing the left button) and release all buttons. A copy of the selected object has been created.
